
Switches can be an incredibly versatile access method with both very simple and highly complex set ups available. This guide describes the function of each of the available settings for switch scanning. These settings can all be found inside the menu bar (three lines top left corner) – Settings – Access – Switches.
Activation
This section determines how it is that Grid should move around a grid set in order to make a selection.
Scan pattern
This determines the order in which cells should be made available for selection. There are three main options available:
- Scan cells one at a time – scan across each cell individually either horizontally or vertically moving across the grid

- Scan rows/columns, then cells – scan down through each row, or across the columns, then moving through that row/column one cell at a time

- Scan blocks first, then cells or row/column – Scan through blocks, determined for each grid. Then use either single cell scanning or row/column scanning to make a selection within that block. Blocks can be uniquely configured for each individual grid

Advancing
Grid can be set to advance to the next option in three ways:
- Automatically Advance – This allows the scanning to run automatically without the need to press switches
- Tap to advance – This allows you to use your switch to tap to advance when scanning
- Hold to advance – This allows you to advance by holding the switch to advance when scanning. When the switch is released, it will stop scanning
When Grid 3 is set to Automatically advance, there are extra options which allow you to:
- Chose the length of time that it will take for the cell to advance
- Choose the length of time that the automatic scanning with pause on the first item
Highlighting
This section determines how you would like to highlight the cells
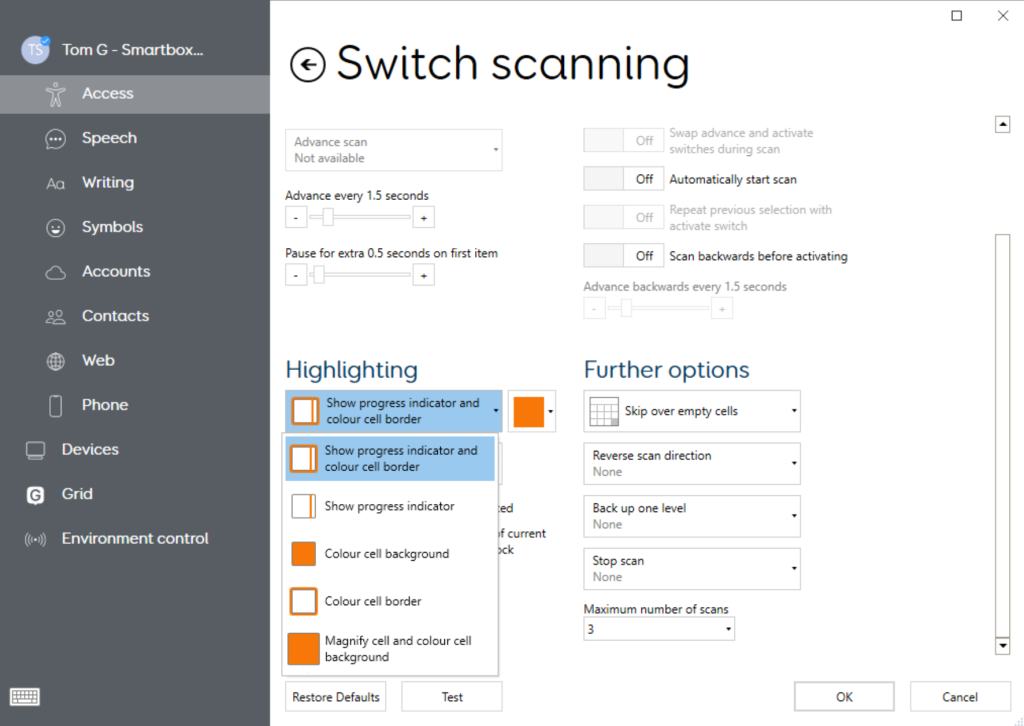
This allows you to choose the colour of your cell highlighting, you can choose from these options:
- Show progress indicator and colour cell border– this allows you to see a progress bar along the cell to show you the amount of time before the next cell is selected with a border around the cell that is selected
- Show progress indicator – this allows you to see a progress bar along the cell to show you the amount of time before the next cell is selected
- Colour cell background – this will allow you to make the whole cell the colour you desire
- Colour cell border – this will highlight around the edge of the cell in the colour that you desire
- Magnify cell and colour cell background – this will enlarge individual cell when select and highlights the same cell

The highlighting option allows you to choose whether you would require sound when selecting a cell.
- No sound when highlighting – Will not have any sound when highlighting a cell
- Speak description when highlighting – Will play a description of the cell when it is highlighted
- Play sound when highlighting – Will play a sound when you have highlighted a cell
Further Options
There are some further options that you can use to personalise your switch scanning settings
- Scan everything – Allows you to scan all the cells that are on the page
- Skip over empty cells – Allows the cells that are empty to not be scanned
- Skip over writing area – Allows the scanning to happen without scanning the writing area
- Skip over empty cells and writing area – Allows you to skip both the writing area and the empty cells

- Reverse scan direction – allows you to select one of your switches to reverse the scan direction. This is helpful if you have skipped over your intended selection and need to go back a few cells.

- The back up one level option, allows you to assign a switch to go back to the previous level of scanning (e.g. stop scanning rows and go back to scanning blocks)

- Stop scan will allow you to assign a switch to stop scanning

- The Maximum number of scans drop-down menu allows you to select the number of times the Grid will scan through. You can have it scan up to five times, or an unlimited amount of time if needed. When using unlimited, it is worth having the stop scanning option set to allow you to stop repeated scanning if the switch is pressed accidentally
Commands

This section allows you add a switch to assign a command. If you select Add switch you can then select a switch and add a command. It will bring up the command page, where you can choose what command, you would like to assign to the switch.


Configuration
Switch Presses
In this area, you are able to set up some settings that include, setting up accidental presses and long holds when using your switches.

Switch Tester
This can show you when you press your switch if it is working and allow you to confirm your timings.
Accidental Presses
These two toggles allow you to:
- Ignore presses – you can select the amount of time in seconds the grid will ignore an accidental press
- Ignore repeat presses – you can select the amount of time in seconds the grid will ignore a repeat press
Accept
The Accept options allow you to choose if you would like to accept on switch press or switch release.

- Accept on switch press – this will allow you to accept when you press the switch
- Accept on switch release – this will allow you to accept when you release the switch and will enable you to use long holds.
Long holds
These two toggles will do the following
- Activate hold action if is held for a certain amount of time in seconds
- A toggle to play a sound after you have held the switch for the certain amount of time
Last Revision: 05.01.2022